So, we finally got round part 2 of this series. In the first part of the series, we looked at how we can create and reuse standard cables using SOLIDWORKS Electrical Routing. In this part of the series, we are going to look at further automating our routing design process using From-To Lists. As mentioned previously in this series, this is a great way of setting up your route layouts in advance, including pin connection information, and is a great method for those who just love using Excel.
Before we get to creating a new From-To List there are a couple of things required beforehand, we require our Components library (Components.xml) and Cable library (cable.xml) to be defined. These would include any components and cables/wires that will be used within the route being generated from the From-To List. For examples of these libraries, you can see the defaults libraries in the following location:
C:\ProgramData\SOLIDWORKS\SOLIDWORKS 2022\design library\routing\electrical
These libraries can be viewed/modified/created using the routing library manager. I would always recommend saving a copy of the default library if you plan on editing the defaults. You could also go one step further and move your custom libraries to a custom file location so that it is separate from the default data provided with SOLIDWORKS. (Note – be sure to set new location in the routing library manager if you move these libraries)
When it comes to creating a From-To List there are a few ways that we can go about it, we can either create a new list through the From-To List Wizard built into SOLIDWORKS; we can create a table of our own in Excel; or we can simply open an existing list and edit it as required. To use either of these options you can access the From-To List Wizard from Tools > Routing > Electrical > From-To List Wizard.
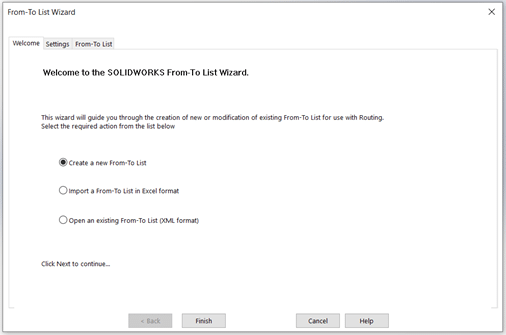
To create a new list from scratch you can either use the wizard as previously mentioned or if you wish to use Excel you can simply start a new list using the wizard, however, export the table to Excel format to complete the setup in Excel. This method will ensure that you have all the required columns in place and that no information is missing. That being said, using the From-To List Wizard will provide drop-down menus for each of the fields that read from the Component or Cable libraries, so if you are just starting out it’s a good way to make sure you are staying on track.
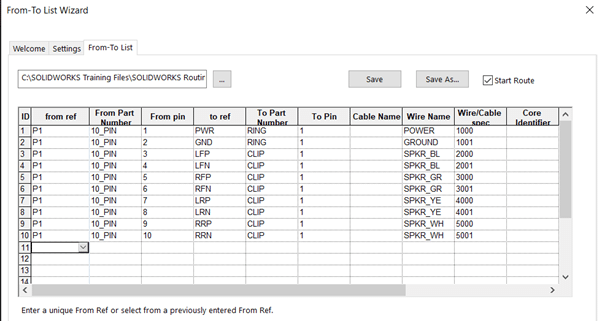
When creating a new list from scratch you will first be prompted to define the locations of the component library, along with the cable library that we previously mentioned. This will then allow the From-To List to read the component and cable libraries pulling the appropriate information into our assembly (part file locations, number of pins, wire colour, wire OD, etc). An example From-To List can be seen below.
Once you have completed the list describing your route you can then return to your assembly and select Start by From/To on the routing electrical tab. It will then ask you to locate the From-To List that you just created. If you have created unique column headers in your list, that are not the default, you can also ensure that these are lined up correctly here.
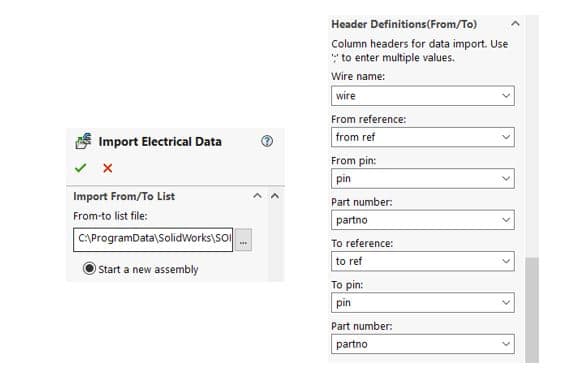
With the From-To List lined up correctly all that is left to do is click okay. From here you will then be prompted to insert all the connectors from the list. Once the last connecter is inserted it will then prompt you to start the route which is, where the smart bit comes into play, as it will automatically start the auto route command displaying guidelines for the connections mentioned in the list. The guidelines option within the auto route tool can then be used to convert the guidelines to routes, merge the guidelines together to create routes or even add guidelines to existing routes. Through this tool we can also use the re-route tool to edit the route through clips if needed.
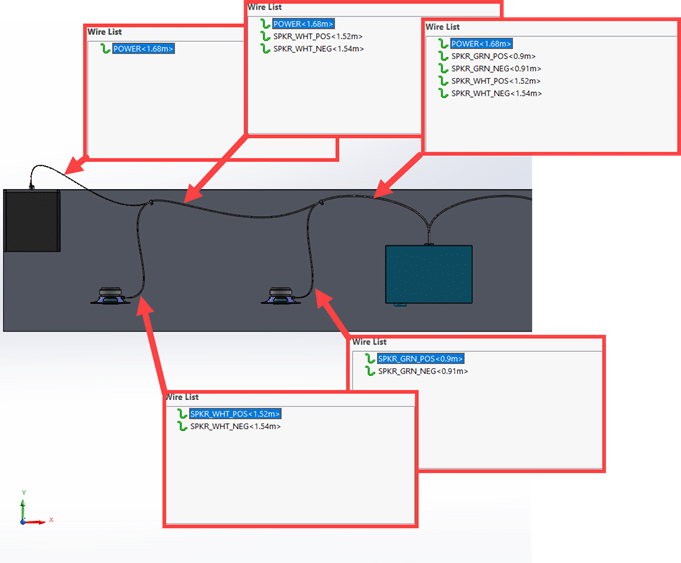
For the final bit of magic, there are always those instances where the design gets changed, maybe an additional connector is added, well this is easily updated as we can simply edit the From-To List then within SOLIDWORKS we have the option to ‘Re-Import From-To’.

