Have you just purchased a new license with a PDM Standard CAD Editor, or a Contributor/Viewer license and need to get up and running with it ASAP? Providing you already have a PDM Standard installation, these quick and easy to follow steps will help you to get on your way in no time at all….
Step 1.
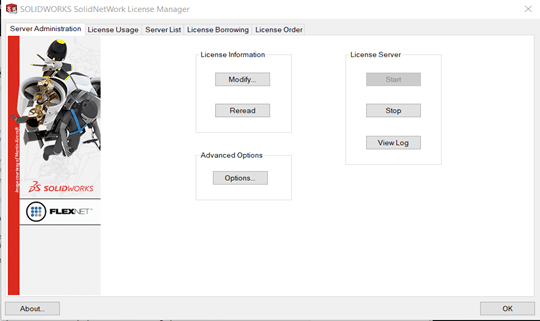
Open the SolidNetwork License Manager Server, easily found by using the search bar on the server.
Step 2.
Before moving on any further, you’ll want to make sure that none of the licenses are in use at the moment. This may require an email round to all SOLIDWORKS users, or simply a shout around the office, but you can always double check the status before proceeding.
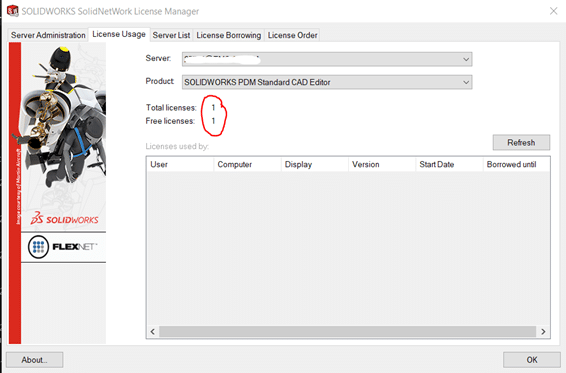
To check all licenses are free, we can click on the “License Usage” tab in the SolidNetwork License Manager. If the number of total licenses is equal to the number of free licenses, we know that no licenses are currently in use.
Step 3.
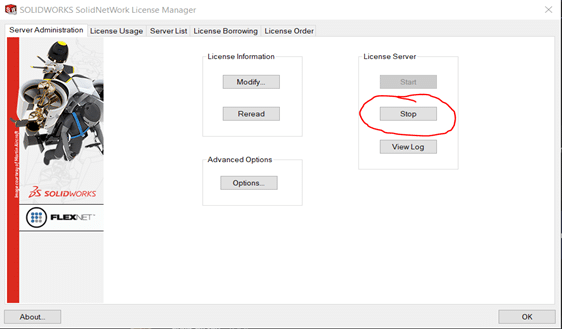
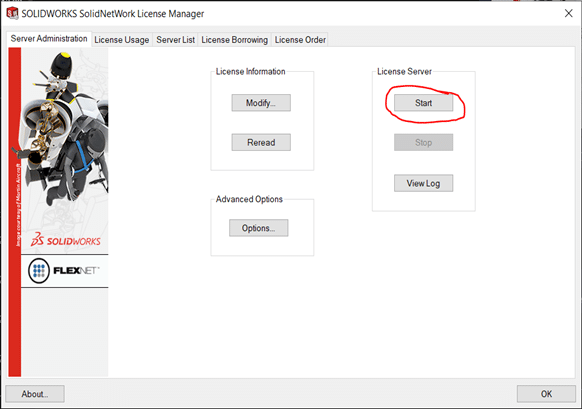
Now we want to stop the server and block access for anyone who is eager to get back to work before you have finished. This can be achieved by navigating back to the “Server Administration” tab.
Step 4.
Adding the New License.
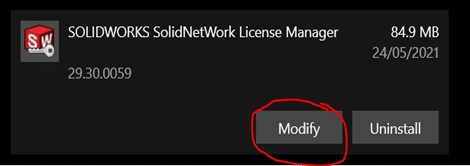
To add the new license to your SNL, you will need to go to “Add or Remove Programs” and select to ‘Modify’ the SolidNetwork License Manger.
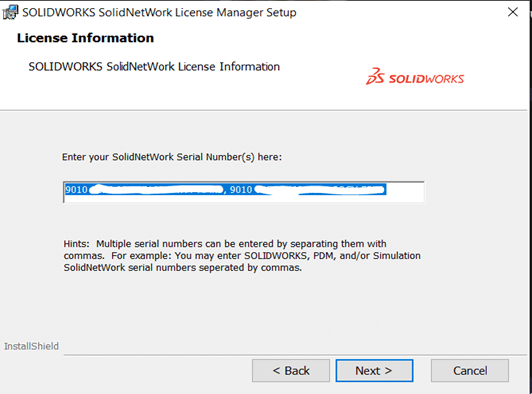
Here you will need to click ‘Next’ through the wizard until you are asked to add your new serial number. You will need to separate your serial numbers with a comma (, ) when adding them all to the correct field.
You can now continue through the Installation Wizard and select ‘Finish’ at the end.
Step 5.
Activating your new serial number within the SNL.
This can be done easily by selecting ‘Modify’ on the SolidNetwork License Manager in the “Server Administration” tab.
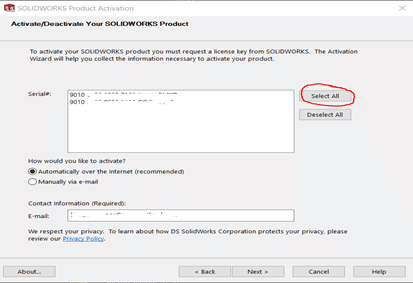
You will first need to select ‘Activate/Deactivate Your SOLIDWORKS Product’ and click through until you are given the option of which serial numbers you want to activate, where you can click “Select All”.
You can then click ‘Next’ and ‘Finish’ after the serial numbers have been activated.
Step 6.
Checking the new license has been activated.
To check the license has been activated you can go back to the “License Usage” tab and you will now see that the total number of licenses has increase by the number of new licenses. This shows the activation has been successful and you are now ready to start using it.
Step 7.
The last step is to restart the SNL (if it hasn’t already done so). You’ll find this option back on the “Server Administration” tab. Once this has been completed, all other users can log back in and continue as before.
Hopefully these quick and easy steps help you with adding any new serial numbers to your SNL, and get you working with them as soon as possible.