AUTODESK

Revit Room Boundaries

Rooms are powerful objects and an essential part of Revit for scheduling information.  It’s important to make sure they are placed correctly and although they are placed in plan view, they are a 3D element enclosing the entire volume that they are allocated to. Rooms automatically pick up bounding elements such as walls, floors and ceilings - and you can use the Highlight Boundaries tool as an aid before placement.

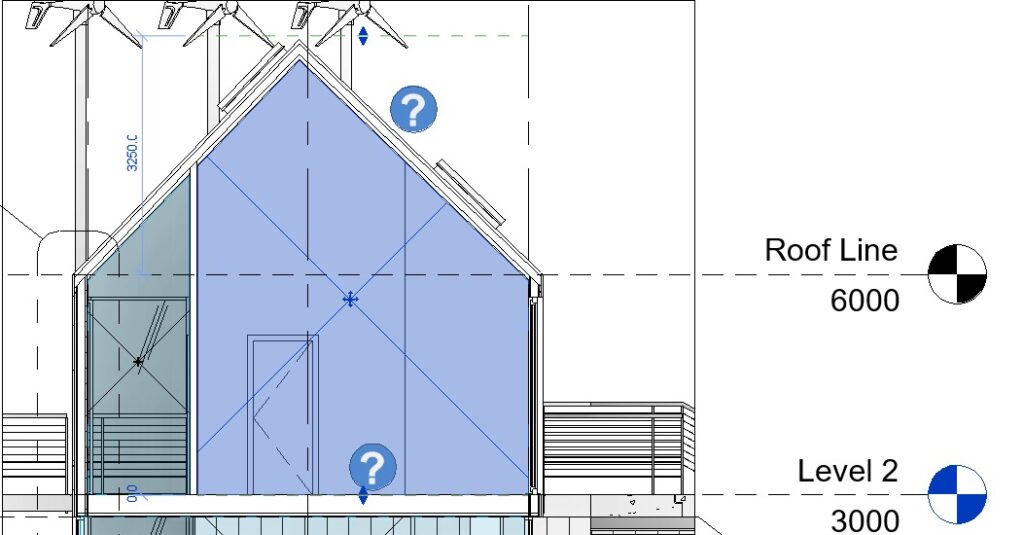
However, you should also be aware of how they associate to levels and how you can utilise the Limit Offset property. When there is no physical element for the Room to be bound by then we can associate it with the Level above, but this can often lead to areas of the building being missed resulting in inaccurate volume calculations – such as the case below where the room volume should include the space up to the underside of the roof but instead incorrectly stops at the Roof Line Level.

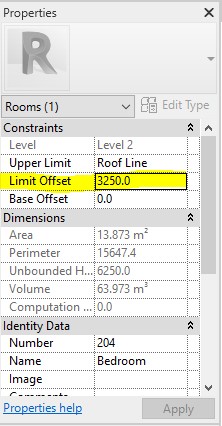
By setting the room’s Limit Offset we can force it to go above the level it is associated to and therefore include the empty roof space – this is also important when relating to the Space tool for MEP calculations. 
Note that Revit now defaults to using the underside of the roof as a bounding element and will report the room volume correctly.

Useful Note – Walls, floors, roofs, ceilings, architectural columns and  curtain systems all have an instance property built in to make them ‘Room Bounding’ this is a tick box which can be switched on or off as necessary.

We hope you enjoy these tips!

Related Articles

 Autodesk Forma Search Sets

 Autodesk Forma Search Sets

When working with large, federated models, finding the information you need can sometimes take almost as much time as the coordination work itself.  Whether you're reviewing MEP systems, checking structural elements or focusing on a...

AutoCAD MOCORO & MSTRETCH Commands Explained

AutoCAD MOCORO & MSTRETCH Commands Explained

Many AutoCAD users rely on familiar commands such as Move, Copy, Rotate and Stretch every day. However, fewer users take advantage of the Express Tools, a collection of productivity features designed to reduce repetitive tasks and speed up common...

Customising The AutoCAD Crosshair

Customising The AutoCAD Crosshair

Every AutoCAD user develops their own way of working. From custom tool palettes and shortcuts to personalised workspaces, tailoring your environment can help you work more efficiently.  One area that's often overlooked is the AutoCAD...